Your garage floor is more than just a place to park your car—it’s an essential part of your home’s overall aesthetics and functionality. If you’re looking to upgrade your garage and give it a polished and durable finish, epoxy coating is the way to go. In Dayton, Ohio, one company stands out for its exceptional garage floor coating services—Epoxy Dayton. In this step-by-step guide, we’ll walk you through the process of transforming your garage floor with epoxy coating, ensuring that your space becomes both visually appealing and highly functional.
Why Choose Epoxy Coating?
Before diving into the step-by-step process, let’s take a moment to understand why epoxy coating is the ideal choice for your garage floor. Epoxy is a durable and long-lasting material that adheres seamlessly to concrete surfaces, creating a glossy and smooth finish. Here are a few reasons why homeowners in Dayton, Ohio, prefer epoxy coating:
Enhanced Durability: Garage floors endure heavy foot traffic, vehicle movement, and exposure to various chemicals. Epoxy coating provides a tough and resilient surface that can withstand these challenges and remain intact for years.
Improved Safety: Epoxy coatings are available in slip-resistant variants, reducing the risk of accidents due to slippery surfaces. With epoxy coating, you can have peace of mind knowing that your garage floor is safe for you and your family.
Easy Maintenance: Epoxy-coated surfaces are effortless to clean and maintain. The smooth and non-porous finish prevents dirt, oil, and other contaminants from penetrating the surface, making it a breeze to wipe clean.
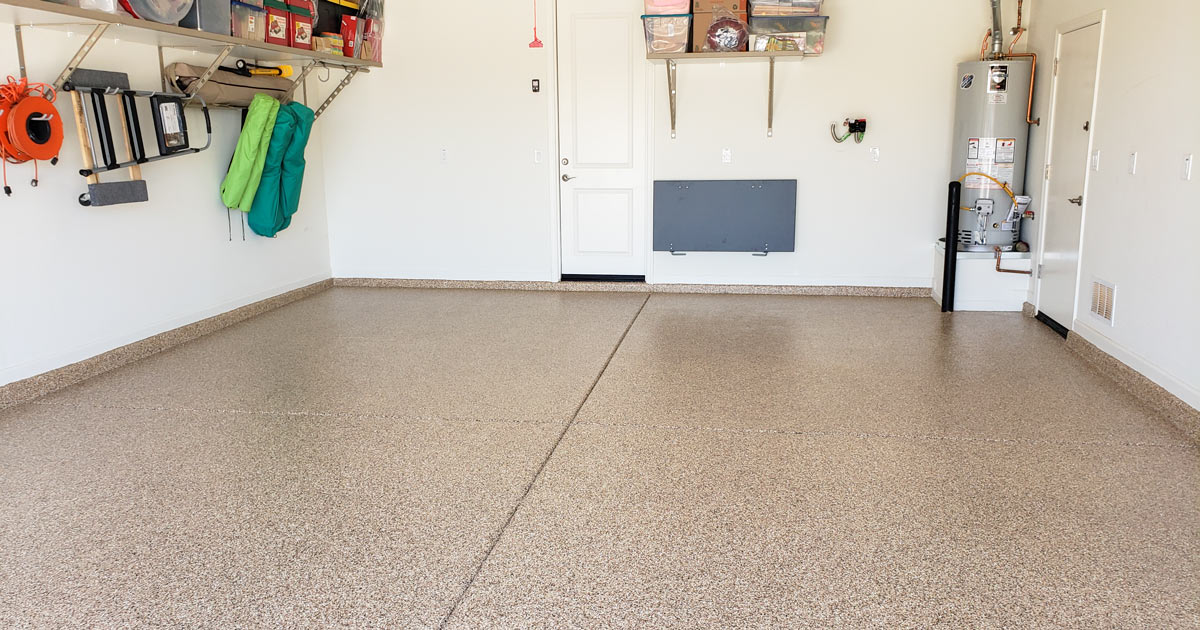
Versatile Design Options: Epoxy coatings come in a wide array of colors, patterns, and finishes. Whether you prefer a solid color, metallic shine, or decorative flakes, Epoxy Dayton can help you achieve the look you desire.
Preparing the Garage Floor
Before applying an epoxy coating, proper preparation is crucial to ensure a successful and long-lasting finish. Follow these steps to prepare your Dayton garage floor:
Clear the Space: Remove all items, tools, and vehicles from your garage. Create a clean and empty workspace to make the coating process easier.
Clean Thoroughly: Sweep the floor to remove loose dirt and debris. Next, scrub the surface using a concrete cleaner and a stiff-bristle brush. Rinse with clean water and allow the floor to dry completely.
Repair Any Damages: Inspect the floor for cracks, holes, or uneven surfaces. Use a concrete repair compound to fill in any gaps and level the floor. Allow the repairs to cure according to the manufacturer’s instructions.
Etch the Surface: Concrete can be porous, which can prevent proper adhesion of the epoxy coating. Etching the floor with a concrete etching solution opens up the pores and enhances the bonding process. Follow the instructions on the etching solution carefully, ensuring proper ventilation and safety precautions.
Remove Oil Stains: If your garage floor has oil stains, it’s essential to remove them before coating. Use a degreaser specifically designed for oil stains and scrub the affected areas. Rinse thoroughly and allow the floor to dry completely.
Applying the Epoxy Coating
Now that your garage floor is properly prepped, it’s time to apply the epoxy coating. Follow these steps to achieve a flawless and professional finish:
Choose the Right Epoxy: Epoxy Dayton offers a range of epoxy coatings suitable for different needs. Consult with their experts to select the epoxy system that best suits your garage floor’s requirements.
Mix the Epoxy: Prepare the epoxy coating according to the manufacturer’s instructions. It typically involves combining a resin and a hardener in specific proportions. Thoroughly mix the components to ensure proper curing.
Apply the Primer: Using a roller or brush, apply the epoxy primer to the entire garage floor. The primer creates a strong bond between the epoxy coating and the concrete surface. Allow the primer to dry as per the manufacturer’s recommendations.
Apply the Base Coat: Once the primer is dry, it’s time to apply the base coat of epoxy. Pour a sufficient amount onto the floor and spread it evenly using a roller or squeegee. Work in small sections to ensure a consistent coating.
Add Decorative Elements (Optional): If you want to enhance the appearance of your garage floor, this is the time to add decorative elements like metallic pigments or decorative flakes. Sprinkle them evenly across the wet base coat to create the desired effect.
Apply the Top Coat: After the base coat has cured according to the manufacturer’s instructions, it’s time to apply the top coat. Pour the epoxy onto the floor and spread it evenly, just like the base coat. Ensure a smooth and even finish without leaving any puddles or drips.
Allow for Curing: Epoxy coatings require sufficient curing time to achieve their full strength and durability. Follow the manufacturer’s instructions for curing time, temperature, and ventilation requirements. Avoid walking or driving on the floor until it has fully cured.
Enjoying Your Newly Coated Garage Floor
Once the epoxy coating has cured completely, it’s time to enjoy your transformed garage space. Here are a few tips to ensure long-lasting beauty and functionality:
Keep It Clean: Regularly sweep or dust mop your epoxy-coated floor to remove loose dirt and debris. When needed, use a mild detergent and water to clean more stubborn stains or spills.
Protect the Surface: Place floor mats or rugs near entrances to prevent tracking dirt and moisture onto the epoxy-coated floor. Avoid dragging heavy items or using sharp tools that can scratch or damage the surface.
Avoid Chemical Spills: While epoxy coatings are highly resistant to chemicals, it’s best to wipe up any spills promptly. Certain harsh chemicals or solvents, such as gasoline or paint thinners, can cause damage if left on the surface for an extended period.
Maintain Temperature and Humidity: Extreme temperature fluctuations or high humidity levels can affect the integrity of epoxy coatings. Maintain a moderate and stable environment in your garage to ensure the longevity of your floor.
Transforming your Dayton garage with an epoxy coating is a smart investment that not only enhances the aesthetic appeal but also improves the functionality and durability of your space. By following this step-by-step guide and entrusting the job to Epoxy Dayton, you can achieve a stunning and long-lasting finish for your garage floor. Don’t wait any longer—take the first step towards a transformed garage today!
Key Takeaways:
- Epoxy coating is an excellent choice for transforming your garage floor in Dayton, Ohio, offering enhanced durability, improved safety, easy maintenance, and versatile design options.
- Properly preparing the garage floor is crucial for a successful epoxy coating application. Clear the space, clean the floor thoroughly, repair any damages, etch the surface, and remove oil stains.
- When applying an epoxy coating, choose the right epoxy system and follow the manufacturer’s instructions for mixing and application.
- Apply the primer, base coat, and optional decorative elements, followed by the top coat. Allow sufficient curing time as per the manufacturer’s recommendations.
- Once the epoxy coating has cured, keep the floor clean, protect the surface from damage, avoid chemical spills, and maintain a moderate temperature and humidity level.
- Epoxy Dayton is a trusted company in Dayton, Ohio, offering professional garage floor coating services to help you achieve a stunning and long-lasting finish for your garage.